Follow Me On Social Media!
Chocolate Fudge Thumbprint Cookies with Vanilla Cream
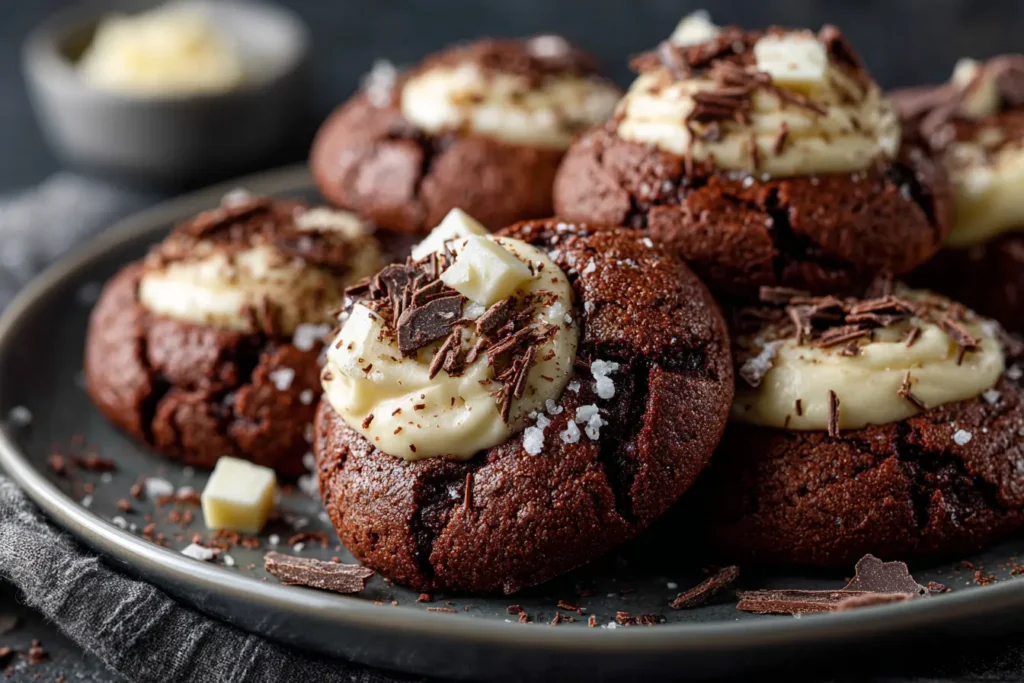
Experience the perfect union of rich, chocolatey indulgence and smooth, creamy sweetness with these thumbprint cookies. The soft fudgy base is crowned with a silky vanilla cream filling, making them ideal for cozy afternoons, special celebrations, or simply treating yourself—because why not?
Why These Cookies Are So Irresistible
- Bakery-worthy but homemade, ready to impress any crowd.
- Great for gifting, cookie exchanges, or anytime you want a special treat.
- Chocolate and vanilla—a timeless flavor duo starring here in harmonious balance.
- Freezable for convenience: prep now, enjoy later.
- Highly customizable: add flavor twists, toppings, or decorations.
The cookie itself is like a fudgy chocolate dream—with a texture that’s soft, chewy, and deeply satisfying. The vanilla cream, made with white chocolate and cream, brings a lush contrast without overpowering. Dark chocolate curls on top add elegance and a final touch of texture.
What You’ll Need
For the Cookies (makes about 18)
- 125 g (1 cup) all-purpose flour
- 45 g (½ cup) unsweetened cocoa powder
- ½ tsp baking soda
- ¼ tsp salt
- 115 g (½ cup) unsalted butter, softened
- 100 g (½ cup) brown sugar
- 50 g (¼ cup) granulated sugar
- 1 large egg
- 1 tsp vanilla extract
- 2 tbsp milk
- 85 g (½ cup) semi-sweet chocolate chips (optional — for extra fudginess)
For the Vanilla Cream Filling
- 120 ml (½ cup) heavy cream
- 2 tbsp sugar
- ½ tsp vanilla extract
- 115 g (4 oz) white chocolate, chopped
For Garnish
- Dark chocolate shavings or curls
Equipment You’ll Need
- Mixing bowls
- Hand mixer or stand mixer
- Whisk and spatula
- Measuring cups and spoons
- Baking sheet lined with parchment paper
- Small saucepan
- Cookie scoop or tablespoon
- Spoon or piping bag for filling
Variations & Flavor Ideas
- Swap vanilla extract with almond or peppermint for a seasonal twist.
- Use dulce de leche or peanut butter ganache in place of the white chocolate filling.
- Replace dairy milk with oat or almond milk.
- Boost chocolate depth with a pinch of espresso powder in the dough.
- Garnish with crushed peppermint or freeze-dried raspberries instead of chocolate shavings.
Step-by-Step Instructions
1. Bake the Cookies
- Preheat the oven to 175 °C (350 °F). Line a baking sheet with parchment paper.
- In a bowl, whisk together flour, cocoa powder, baking soda, and salt.
- In another bowl, cream softened butter with brown sugar and granulated sugar until light and fluffy.
- Beat in the egg, vanilla extract, and milk until well combined.
- Gradually blend in the dry ingredients until just incorporated. Fold in chocolate chips if using.
- Scoop tablespoon-sized dough portions and roll into balls. Arrange them on the prepared baking sheet.
- Press a thumb or spoon into the center of each ball to form a well.
- Bake for 8–10 minutes, until cookie edges are set but centers remain soft.
- If the indent has puffed up, gently re-press it while the cookies are still warm. Let them cool completely on a wire rack.
2. Prepare the Vanilla Cream
- In a small saucepan, heat the cream and sugar over medium heat just until it begins to simmer.
- Remove from heat, then stir in chopped white chocolate and vanilla extract until smooth and glossy.
- Allow the mixture to cool until it’s thickened, yet still pourable.
3. Assemble
- Once cookies are fully cooled, spoon or pipe the vanilla cream into each center.
- Sprinkle with dark chocolate shavings or curls.
- Let the cream set at room temperature, or refrigerate briefly to accelerate the process.
- Serve and indulge!
Pro Tips for Perfect Cookies
- Avoid overbaking: The centers should stay soft; they’ll firm up as they cool.
- Even sizing: Use a cookie scoop for uniform baking.
- Fresh thumbprint: Re-press indents post-bake while warm for neat, defined wells.
- Cool completely before adding filling to avoid melting.
- Ideal filling consistency: Cool it until thick but still pipeable to prevent runny results.
Storage and Make-Ahead
- Room temp: Keep in an airtight container for up to 3 days.
- Refrigerator: Lasts up to 5 days.
- Freezing: Freeze unfilled cookies for up to 2 months—then thaw and fill when ready. You can freeze filled cookies too; just thaw them overnight in the fridge before serving.
FAQ
Can I prep the dough ahead of time?
Yes — refrigerate up to 48 hours or freeze (unbaked) longer. Thaw slightly before rolling and baking.
Can I use milk chocolate instead of white for the filling?
Absolutely! The flavor will be sweeter and a bit softer, but still delicious.
How do I prevent the filling from overflowing?
Ensure the thumbprint indent is deep enough and let the filling firm up slightly before piping in.
Are the chocolate chips necessary?
No — they’re optional. The dough is already rich, but they add an extra fudgy punch.
Final Thoughts
These cookies look as good as they taste—rich chocolate, silky vanilla cream, and artful garnishes. Elegant enough for special occasions, and easy enough for an afternoon treat. Try baking a batch, share them with loved ones, and create a little homemade magic in your kitchen.